
The Internet has become one of the most powerful tools. It allows one to access all kinds of information in mere seconds. One can access email, search on Google, read Wikipedia, and a lot more using the internet. We often use the internet in our homes and offices without knowing its basics.
Such is the case with a router. A router is used for connecting a device to the internet. Most broadband Internet Service Providers(ISP) use a router to configure their networks and provide their clients with an internet connection.
Using a wireless router, you can use the same strategy to create your network for WIFI in your home or office. You will likely be offered a wireless router when you contact an ISP.
As a result, it can be tricky to configure your Wireless Router. However, the good part is, configuring your wireless router is no rocket science! You don’t need to be a tech expert to do that.
In this article, we are going to assist you with our step-by-step guide on configuring your wireless router. With that, let’s get into the details below!
Setting Up The Wireless Router
Here is our quick and easy step-by-step guide to setting up your wireless router.
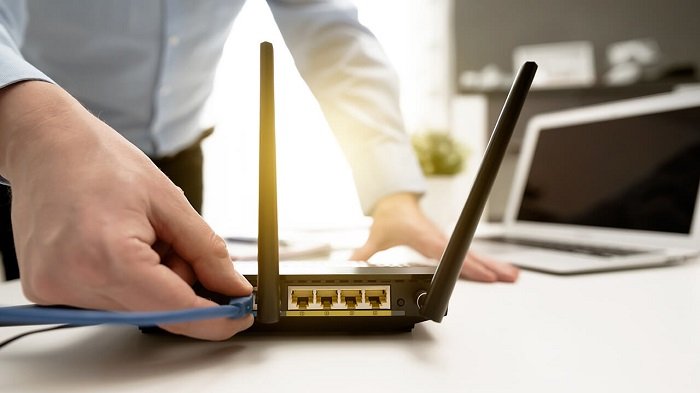
Step 1: Once you have purchased a wireless router, you will be needed to connect it to an existing internet modem provided by the ISP.
Step 2: It would help if you used an Ethernet cable to connect the wireless router to the modem. It is a short cable that is generally included with the wireless router.
Step 3: You should then plug in the power cable of the wireless router to turn it on.
Step 4: Once done, you must wait for a minute until the lights on the router start working.
After you have set up your wireless router by connecting it to a modem using an ethernet cable, you should start configuring it by following the steps mentioned below.
Configuring a Router
In further steps, you will need a computer or laptop to configure your router’s default settings. When configuring a router, you can set a different name and password for your wireless network.
Step 1: Open a web browser using your laptop. Enter your router’s default IP address into the web browser’s address bar and press Enter. You will likely find your router’s default IP address in the user manual or the instruction set. However, some of the most common IP addresses can be 192.168.0.1, 192.168.1.1, and 192.168.2.1.
Step 2: After you have entered the default IP address of your router in the browser, a sign-in page will appear. You must sign into the network by following the router’s instructions which will be included with the router you purchase or get from your ISP. If you do not find the sign-in details with the router, you can try using some common username and password combinations such as “admin” and “password.”
Step 3: Once you sign into the network by entering the username and password associated with your router, a settings page will appear. You should find out and select the “Network Name” option and then enter a unique name for your network.
Step 4: You will be needed to set up the password once you have located the network name. You should find the “Network Password” option and choose an encryption method for your router. Encryption methods can range from several types. Although, it will be best for you to select the “WPA2” setting, which is considered the most secure type of encryption.
Step 5: After selecting the method of encryption, you should set up your desired password under the Network Password setting. You must use a strong alphanumeric password to ensure no one else can access your network.
Step 6: After following the above steps, you should look for the “Save” button to save your settings and click on it.
By following the above steps, you have set up and configured your router and are ready to connect to the Wi-Fi network to ensure it is working. You might encounter different steps depending on your computer. However, the steps mentioned earlier are common to most systems.
Connecting to Your Wi-Fi
Step 1: You should locate your computer’s network settings and turn on the Wi-Fi. Once done, you will be required to search for a nearby Wi-Fi network.
Step 2: You will likely see your network in the list of available networks with the name you set up earlier. You should connect to it by entering the password.
Step 3: Lastly, you should open a browser in your system and try to navigate the internet to check if the page loads with results. If it does, it means you have configured your Wi-Fi network for the router correctly.
Wrapping up
It comes as no surprise that we are all connected to the internet somehow. In our daily lives, we rely heavily on the internet. Whether it is for work or studies, or maybe watching a simple video for fun, the internet has become our go-to solution.
Now, if you are getting a wireless connection, whether at home or at the workplace, configuring your wireless router can be tricky sometimes. However, with the steps mentioned above, you can easily do the needful without any hassle.
So, wave goodbye to the hassle and follow the steps given above!
We hope our guide to configuring your wireless router helped you. If you get stuck with any step, let us know in the comment section, and we will be happy to help you!
Frequently Asked Questions
1. What should I do if I cannot find the sign-in credentials of my router during the initial setup?
You should try using standard credentials such as “admin” and” password” to check if your router accepts it. If it does not, you should contact your ISP and ask them for the latter.
2. Should I need to change the region to my location when configuring a wireless router?
Yes. Regions determine channels that routers use to broadcast the internet for your network. If you do not set up your region, your router will have difficulty broadcasting channels and providing a stable internet connection.
3. Where should I go to configure my wireless router?
You should head onto the online configuration interface by typing your router’s default IP address in a browser and set up accordingly.
4. Should I wait if all lights do not start blinking?
You should wait for at least one minute after connecting the Ethernet cable to your router to check if all lights are working on your router. If all lights do not start blinking, you should contact your ISP or try to reconnect the Ethernet cable from the modem to the router.
Also Read:
How to See Someone’s Search History Through Wifi
How to Play Music While on Call on Android & iPhone
How to Change Someone’s Snapchat Display Name Back to Their Default


2 Comments